How to Install .deb Files on Ubuntu 24.04 (GUI & Terminal Methods)


Many developers and system administrators prefer the Ubuntu operating system. As with any other Linux distribution, package management is one of the fundamental tasks. While Ubuntu Software Center and the APT package manager simplify software installation, there are instances you will be required to install software from a .deb file. Linux software distribution through Ubuntu systems relies fundamentally on Debian package files as the default distribution method.
This article discusses different methods for installing the .deb file on Ubuntu 24.04. The guide provides visual installation through the GUI and command-line procedures to suit all uses. It also contains diagnostic guidance and industry best practices to help users achieve trouble-free installations.
#What is a .deb file?
Before discussing installation procedures, let's briefly discuss the .deb file. The software package format known as a .deb is designed for Debian-based operating systems, including Ubuntu. Inside this package, one can find the necessary application files, dependencies, and installation scripts that enable software setup on their system. Ubuntu users typically use .deb files while acquiring software directly from website developers and when official repository packages lack specific packages.
There are multiple ways of installing .deb files on Ubuntu 24.04. Let’s look at all the methods in detail.
Deploy and scale your projects with Cherry Servers' cost-effective dedicated or virtual servers. Enjoy seamless scaling, pay-as-you-go pricing, and 24/7 expert support—all within a hassle-free cloud environment.
#Installing .deb file on Ubuntu 24.04
#Method 1: Using the Graphical User Interface (GUI) with software install
The graphical user interface of Ubuntu 24.04 simplifies the process of .deb file installation without any hassle. This is the recommended approach for users who want to install software using a few mouse clicks.
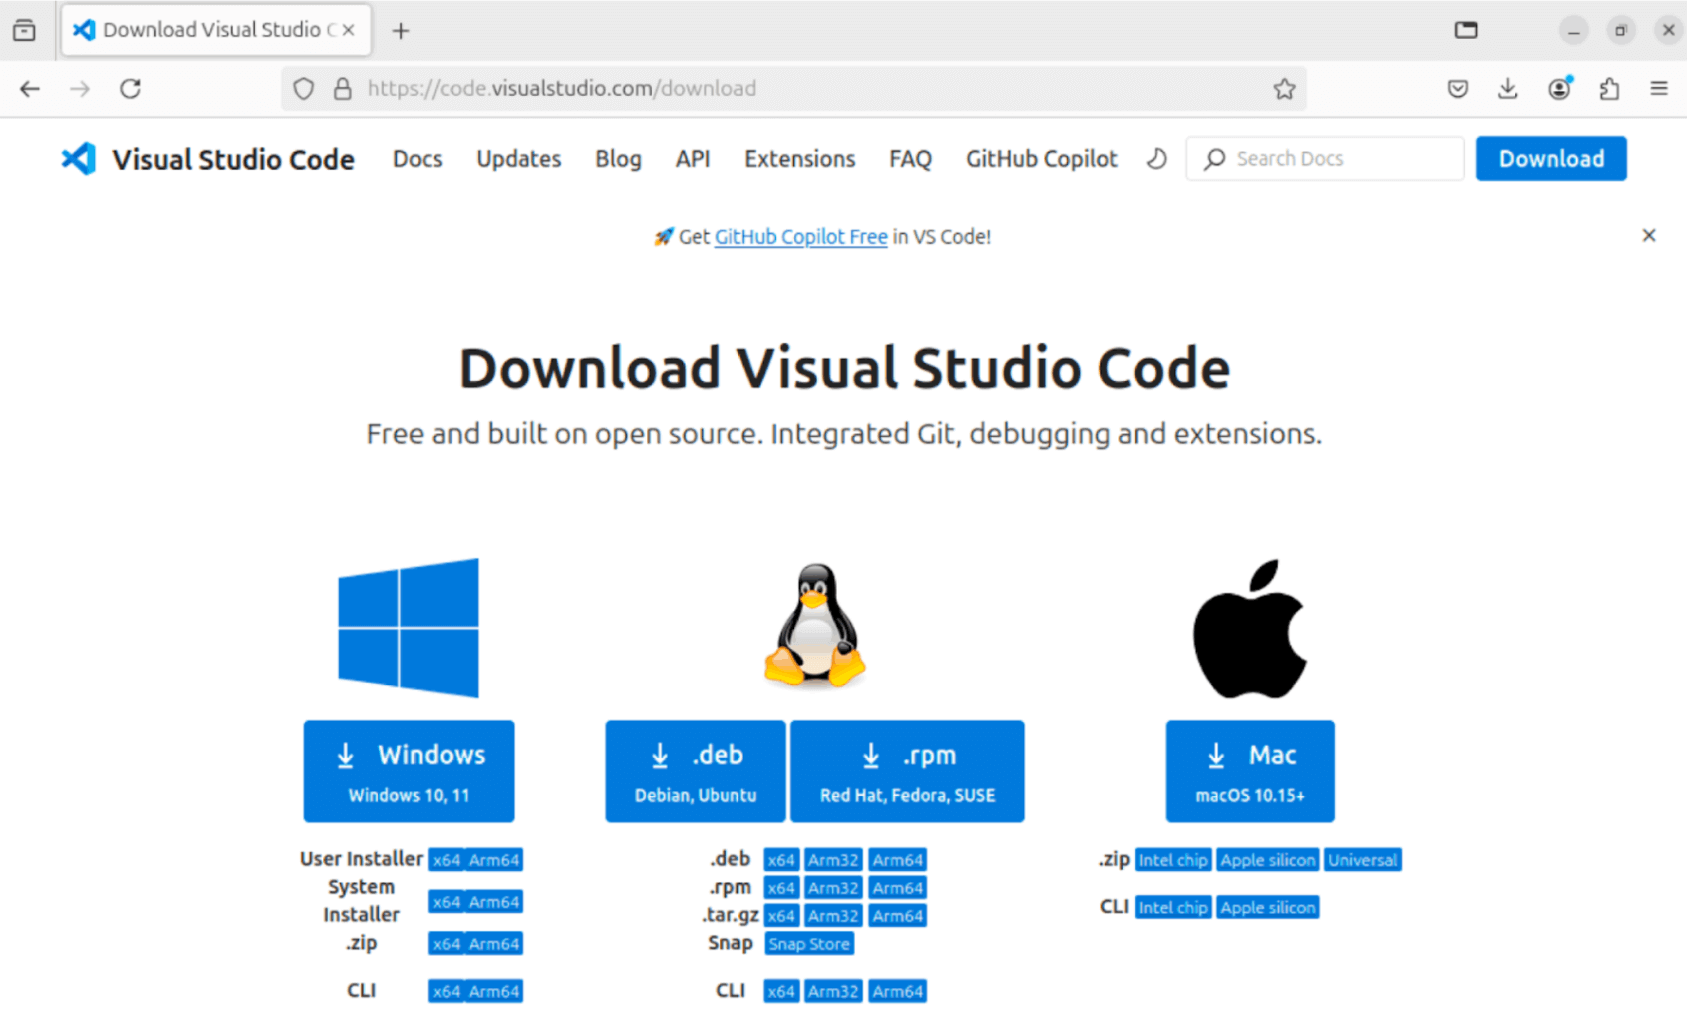
#Download the VS Code .deb file
Open your web browser (e.g., Firefox) and visit the official Visual Studio Code download page. Under the Debian, Ubuntu section, click the .deb button. This will download a file like code_1.98.2-1741787947_amd64 (version numbers may vary) to your Downloads folder.
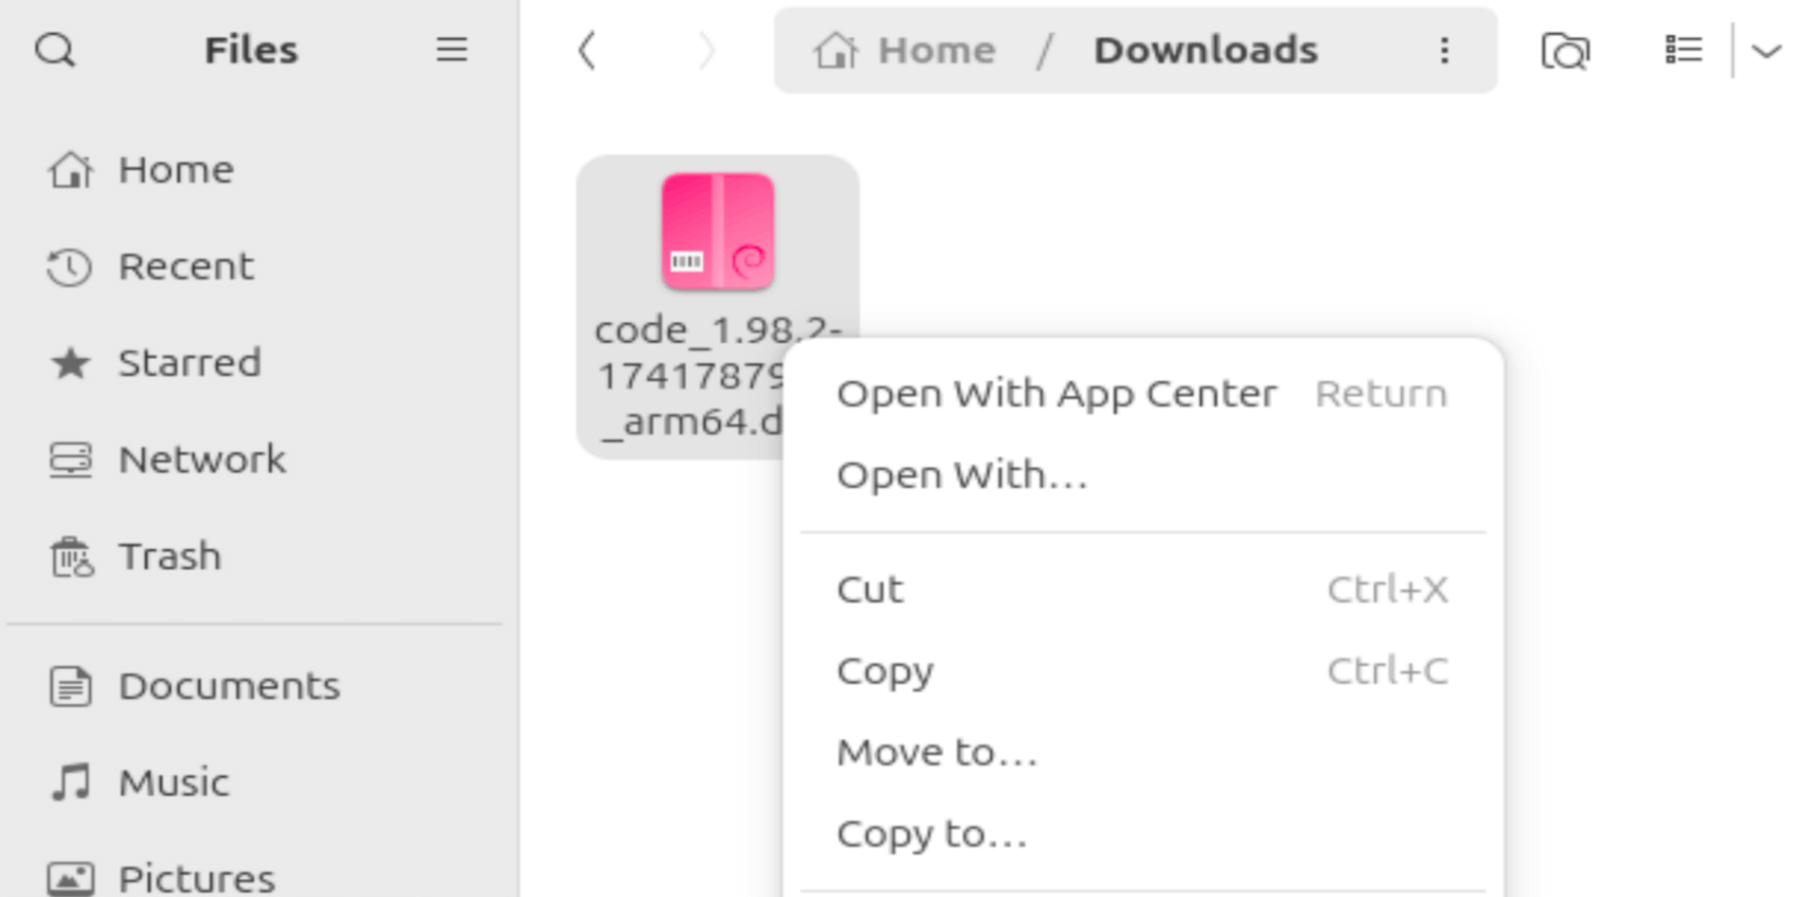
#Locate the file
Open your file manager and navigate to the Downloads folder where the .deb file is saved.
#Double-click the file
Double-click the .deb file (e.g., code_1.98.2-1741787947_amd64.deb). Ubuntu 24.04 will automatically launch the App Center application. You can also right-click on the .deb file and choose other installer software using the Open With option.
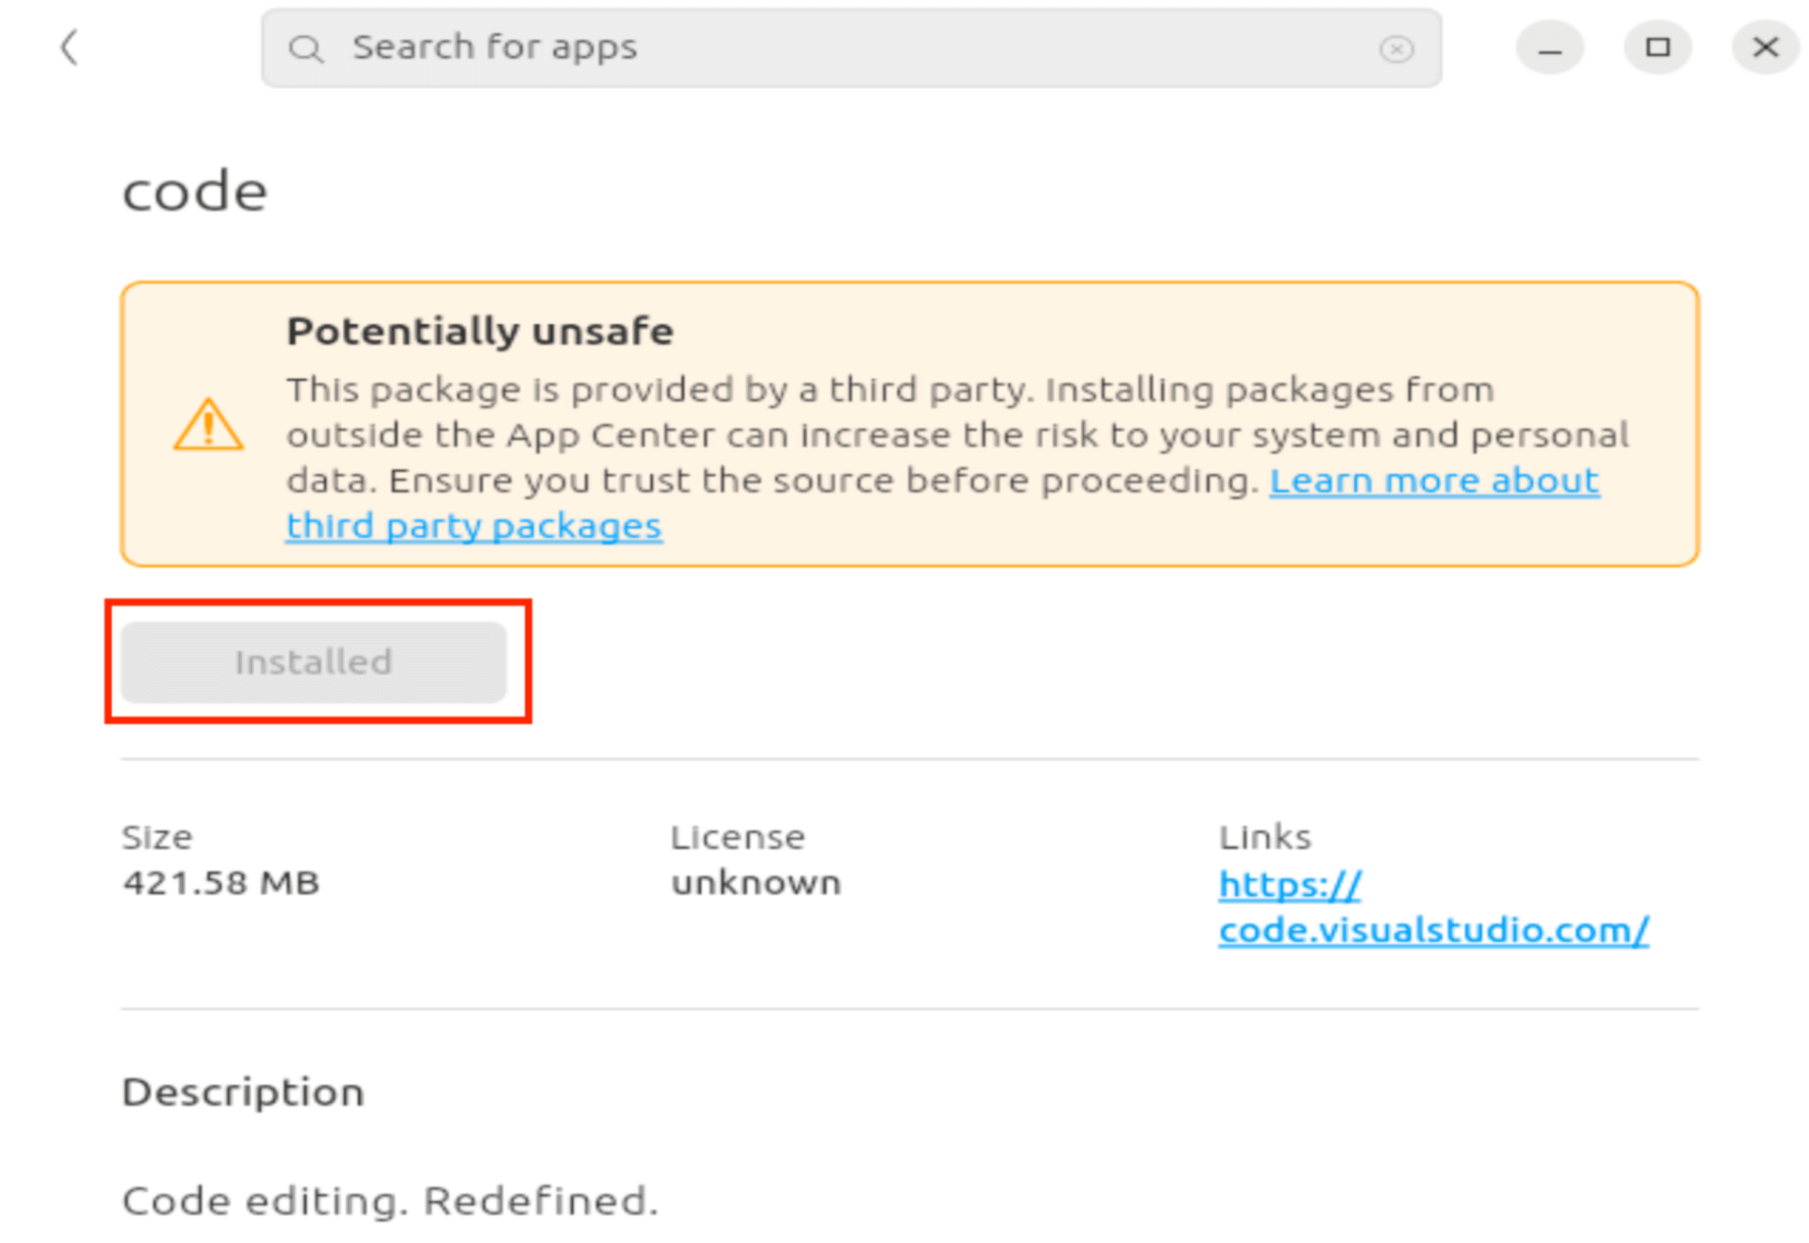
#Review package details
A window will pop up, displaying information about Visual Studio Code, such as its name, version, and a brief description. Ensure it’s the correct package.

#Click install
Click the Install button. You’ll be prompted to enter your administrator password to authorize the installation. The system will resolve any dependencies automatically.
#Wait for installation
Depending on your system and internet speed, the process may take a few seconds to a minute. Once completed, you’ll see a confirmation message.
#Confirm installation
Check the VS Code version on the terminal.
code --version
Output1.98.2
ddc367ed5c8936efe395cffeec279b04ffd7db78
x64
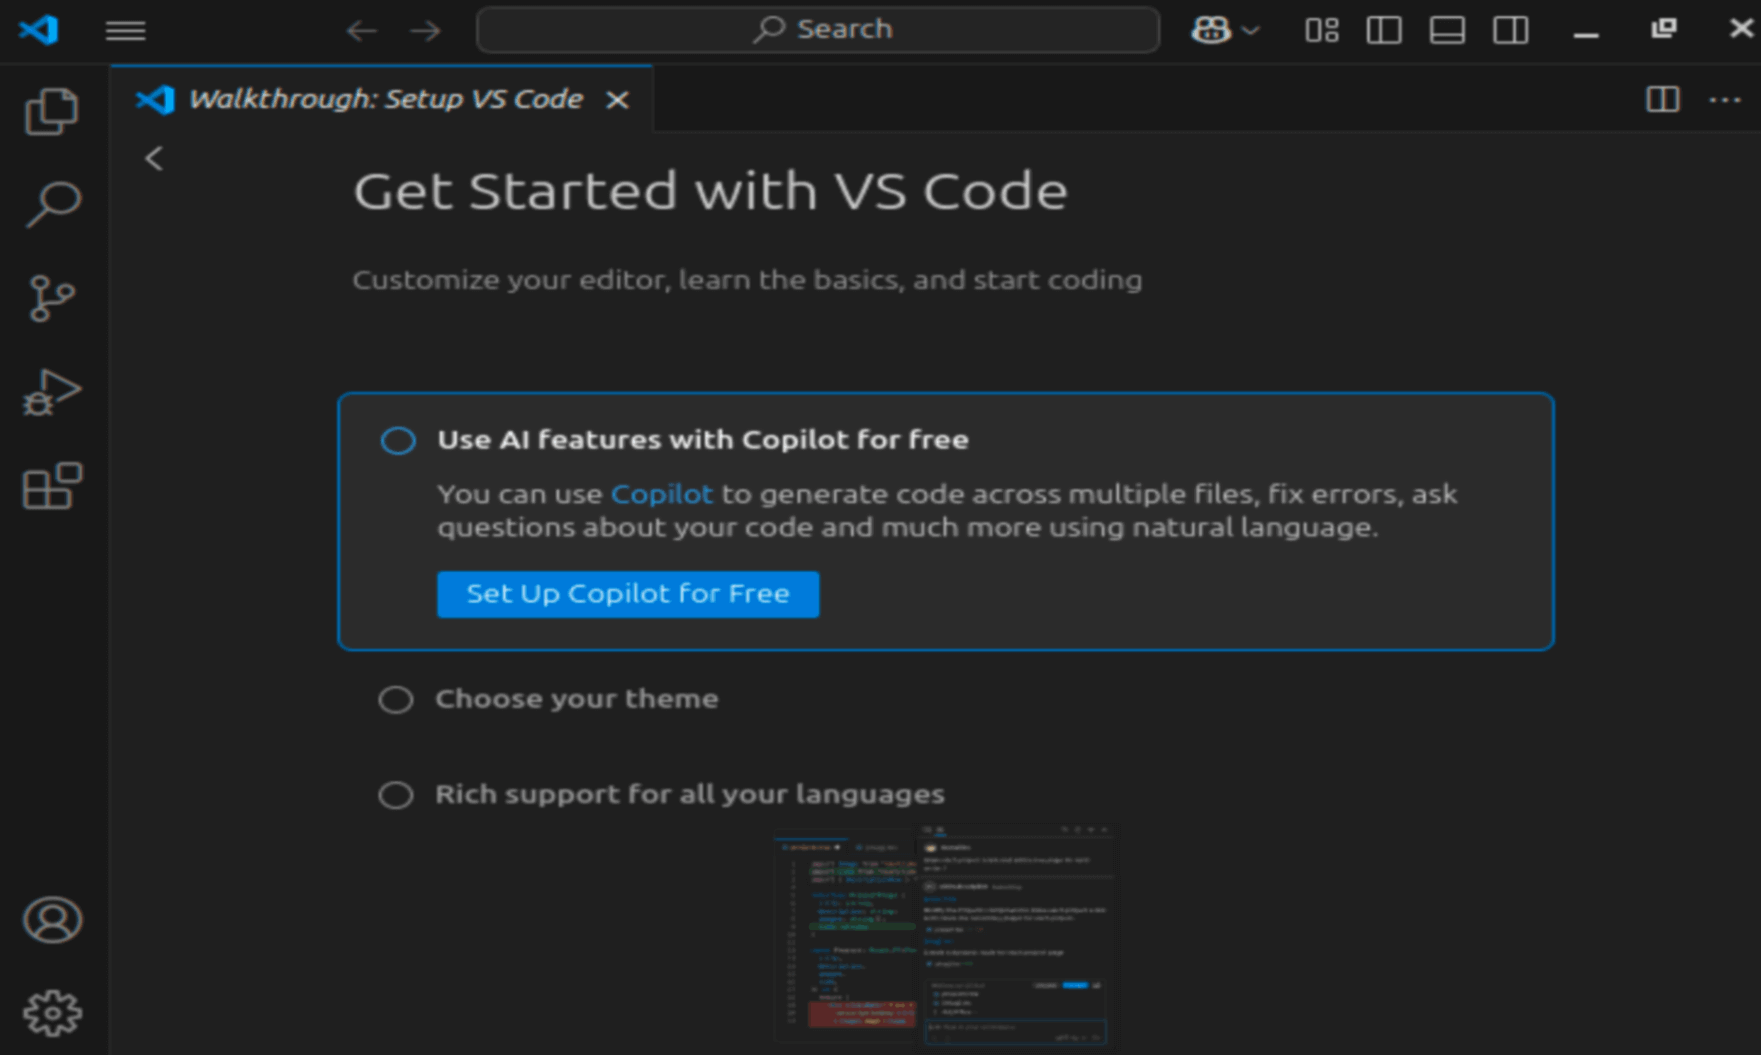
#Launch VS Code
Find Visual Studio Code in your application menu (click Show Applications) or launch it directly from the Software Install window if prompted. Alternatively, type code in a terminal to start it.
code
Pros:
- Simple and intuitive.
- No need to use the terminal.
- Automatically resolves dependencies (if connected to the internet).
Cons:
- Limited control over the installation process.
- May not provide detailed error messages if something goes wrong.
#Method 2: Using the terminal with apt
For those comfortable with the command line, the apt package manager offers a reliable way to install .deb files. This method leverages Ubuntu’s built-in tools to ensure dependencies are resolved correctly.
#Open the terminal
Press Ctrl + Alt + T to launch the terminal, or search for Terminal in the application menu.
#Navigate to the file location
Use the cd command to move to the directory containing the .deb file. For example, if it’s in your Downloads folder, type:
cd Downloads/
#Install the .deb file
Run the following command to install Visual Studio Code using apt.
sudo apt install ./code_1.98.2-1741787947_amd64.deb
- sudo: Grants administrative privileges.
- apt install: Tells the package manager to install the file.
- ./: Specifies the file is in the current directory.
OutputNote, selecting 'code' instead of './code_1.98.2-1741787947_amd64.deb'
Installing:
  code

Summary:
  Upgrading: 0, Installing: 1, Removing: 0, Not Upgrading: 120
  Download size: 0 B / 100 MB
  Space needed: 422 MB / 10.7 GB available

Get:1 /home/ubuntu/Downloads/code_1.98.2-1741787947_amd64.deb code x64 1.98.2-1741787947 [100 MB]
Preconfiguring packages ...
Selecting previously unselected package code.
(Reading database ... 206076 files and directories currently installed.)
Preparing to unpack .../code_1.98.2-1741787947_amd64.deb ...
Unpacking code (1.98.2-1741787947) ...
Setting up code (1.98.2-1741787947) ...
Processing triggers for gnome-menus (3.36.0-1.1ubuntu3) ...
Processing triggers for shared-mime-info (2.4-5) ...
Processing triggers for desktop-file-utils (0.27-2build1) ...
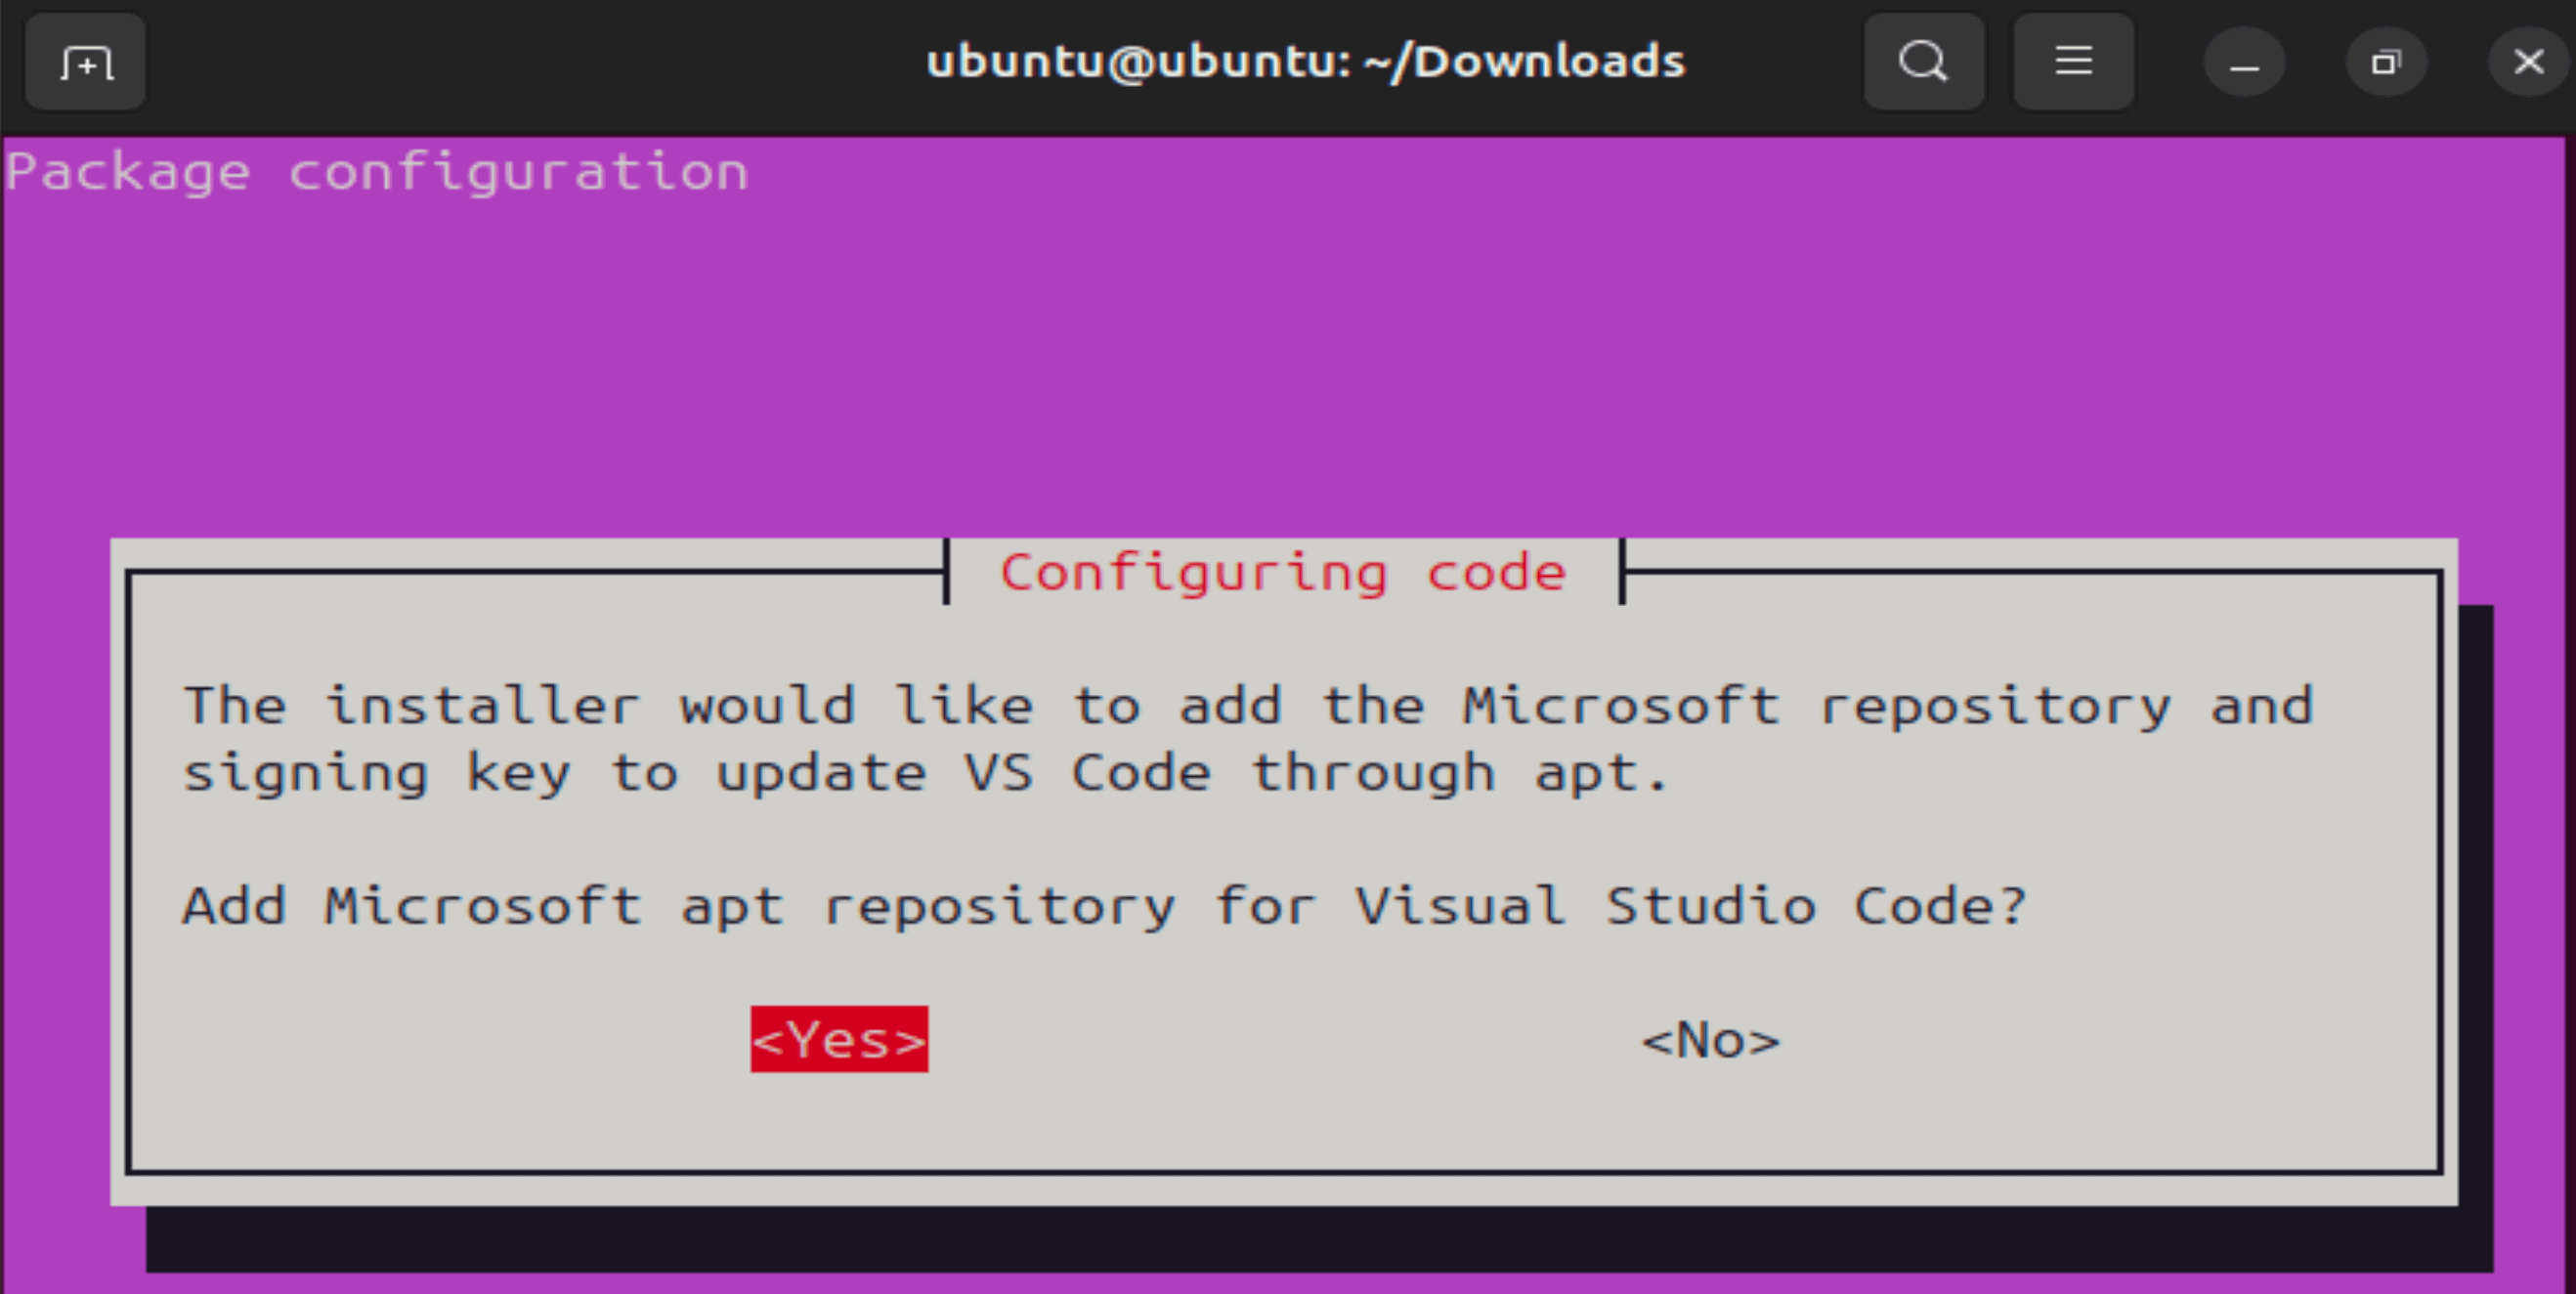
While configuring the code, you will get the prompt below; select yes to add the Microsoft apt repository for Visual Studio Code.
#Enter your password
Type your password when prompted and press Enter.
#Verify installation
Once the process is complete, you can verify the software is installed by checking its version or running it. For example:
code --version
Output1.98.2
ddc367ed5c8936efe395cffeec279b04ffd7db78
x64
Pros:
- Fast and efficient.
- Automatically handles dependencies.
- Provides detailed output for troubleshooting.
Cons:
- Requires basic terminal knowledge.
- No graphical feedback.
#Method 3: Using dpkg (Manual installation)
The dpkg command is a lower-level tool for directly installing .deb files. While it doesn’t resolve dependencies automatically like apt, it gives you more control and is useful in specific scenarios (e.g., offline installations).
#Open the terminal
Launch the terminal with Ctrl + Alt + T.
#Navigate to the file location
Move to the directory containing the .deb file:
cd ~/Downloads
#Install the .deb file
Use the dpkg command to install the package:
sudo dpkg -i example-package_1.0.0_amd64.deb
- -i: Installs the package.
OutputSelecting previously unselected package code.
(Reading database ... 206076 files and directories currently installed.)
Preparing to unpack code_1.98.2-1741787947_amd64.deb ...
Unpacking code (1.98.2-1741787947) ...
Setting up code (1.98.2-1741787947) ...
Processing triggers for gnome-menus (3.36.0-1.1ubuntu3) ...
Processing triggers for desktop-file-utils (0.27-2build1) ...
Processing triggers for shared-mime-info (2.4-5) …
In this step, you will also get the prompt below while configuring the code; select yes to add the Microsoft apt repository for Visual Studio Code.

#Check for errors
If the installation fails due to missing dependencies, you will see an error message like:
Outputdpkg: dependency problems prevent configuration of example-package…
#Fix dependencies (If Needed)
To resolve missing dependencies, run:
sudo apt-get install -f
This command fetches and installs any required packages and then completes the configuration of the .deb file.
#Confirm installation
Check that the software is installed by running it or checking its version.
code --version
Output1.98.2
ddc367ed5c8936efe395cffeec279b04ffd7db78
x64
Pros:
- Works offline (if dependencies are already met).
- Offers granular control.
Cons:
- Doesn’t resolve dependencies automatically.
- Requires additional steps if issues arise.
#Method 4: Using GDebi (Lightweight GUI alternative)
GDebi is a lightweight graphical tool specifically designed for installing .deb files. It’s not installed by default in Ubuntu 24.04, but it’s a great option if you want more details than the default Software Install app provides.
#Install GDebi
Open the terminal and install GDebi:
sudo apt install gdebi
OutputInstalling:
  gdebi

Installing dependencies:
  build-essential             	liblist-someutils-xs-perl
  diffstat                    	liblist-utilsby-perl
  dpkg-dev                    	liblsan0
  fakeroot                    	libmarkdown2
  g++                         	libmath-base85-perl
  g++-14                      	libmldbm-perl
  g++-14-aarch64-linux-gnu    	libmodule-implementation-perl
  g++-aarch64-linux-gnu       	libmodule-runtime-perl
  gcc                         	libmoo-perl
  gcc-14                      	libmoox-aliases-perl
  gcc-14-aarch64-linux-gnu    	libmouse-perl
  gcc-aarch64-linux-gnu       	libnamespace-clean-perl
  gdebi-core                  	libnet-domain-tld-perl
  gettext                     	libnet-ipv6addr-perl
  intltool-debian             	libnet-netmask-perl
  libalgorithm-diff-perl      	libnetaddr-ip-perl
  libalgorithm-diff-xs-perl   	libnumber-compare-perl
  libalgorithm-merge-perl     	libpackage-stash-perl
  libaliased-perl             	libpackage-stash-xs-perl
  libapt-pkg-perl             	libparams-classify-perl
  libarchive-zip-perl         	libparams-util-perl
  libasan8                    	libpath-tiny-perl
  libb-hooks-endofscope-perl  	libperlio-gzip-perl
  libb-hooks-op-check-perl    	libperlio-utf8-strict-perl
  libberkeleydb-perl          	libproc-processtable-perl
  libcapture-tiny-perl        	libregexp-wildcards-perl
  libcc1-0                    	librole-tiny-perl
  libclass-data-inheritable-perl  libsereal-decoder-perl
  libclass-inspector-perl     	libsereal-encoder-perl
  libclass-method-modifiers-perl  libsocket6-perl
  libclass-xsaccessor-perl    	libsort-versions-perl
  libconfig-tiny-perl         	libstdc++-14-dev
  libconst-fast-perl          	libstrictures-perl
  libcpanel-json-xs-perl      	libsub-exporter-perl
  libdata-dpath-perl          	libsub-exporter-progressive-perl
  libdata-messagepack-perl    	libsub-identify-perl
  libdata-optlist-perl        	libsub-install-perl
  libdata-validate-domain-perl	libsub-name-perl
  libdata-validate-ip-perl    	libsub-quote-perl
  libdata-validate-uri-perl   	libsyntax-keyword-try-perl
  libdevel-callchecker-perl   	libterm-readkey-perl
  libdevel-size-perl          	libtext-glob-perl
  libdevel-stacktrace-perl    	libtext-levenshteinxs-perl
  libdpkg-perl                	libtext-markdown-discount-perl
  libdynaloader-functions-perl	libtext-xslate-perl
  libemail-address-xs-perl    	libtime-duration-perl
  libexception-class-perl     	libtime-moment-perl
  libfakeroot                 	libtsan2
  libfile-fcntllock-perl      	libubsan1
  libfile-find-rule-perl      	libunicode-utf8-perl
  libfile-sharedir-perl       	libvariable-magic-perl
  libfont-ttf-perl            	libwww-mechanize-perl
  libfreezethaw-perl          	libxml-libxml-perl
  libgcc-14-dev               	libxml-namespacesupport-perl
  libhtml-html5-entities-perl 	libxml-sax-base-perl
  libhtml-tokeparser-simple-perl  libxml-sax-expat-perl
  libhwasan0                  	libxml-sax-perl
  libimport-into-perl         	libxs-parse-keyword-perl
  libio-interactive-perl      	libyaml-libyaml-perl
  libio-string-perl           	lintian
  libipc-run3-perl            	lto-disabled-list
  libiterator-perl            	lzip
  libiterator-util-perl       	lzop
  libitm1                     	make
  libjson-maybexs-perl        	patchutils
  liblist-compare-perl        	t1utils
  liblist-someutils-perl

Suggested packages:
  debian-keyring  gcc-14-locales     	libstdc++-14-doc
  gcc-14-doc  	gdb-aarch64-linux-gnu  libbareword-filehandles-perl
  gcc-multilib	autopoint          	libindirect-perl
  autoconf    	gettext-doc        	libmultidimensional-perl
  automake    	libasprintf-dev    	libxstring-perl
  libtool     	libgettextpo-dev   	libxml-sax-expatxs-perl
  flex        	git                	binutils-multiarch
  bison       	bzr                	libtext-template-perl
  gcc-doc     	libscalar-number-perl  make-doc

Recommended packages:
  libgtk2-perl

Summary:
  Upgrading: 0, Installing: 134, Removing: 0, Not Upgrading: 120
  Download size: 56.0 MB
  Space needed: 202 MB / 10.7 GB available

Continue? [Y/n] Y
Get:1 http://ports.ubuntu.com/ubuntu-ports oracular/main x64 libcc1-0 x64 14.2.0-4ubuntu2 [49.6 kB]
Get:2 http://ports.ubuntu.com/ubuntu-ports oracular/main x64 libitm1 x64 14.2.0-4ubuntu2 [27.8 kB]
Get:3 http://ports.ubuntu.com/ubuntu-ports oracular/main x64 libasan8 x64 14.2.0-4ubuntu2 [2,892 kB]
Get:4 http://ports.ubuntu.com/ubuntu-ports oracular/main x64 liblsan0 x64 14.2.0-4ubuntu2 [1,283 kB]
Get:5 http://ports.ubuntu.com/ubuntu-ports oracular/main x64 libtsan2 x64 14.2.0-4ubuntu2 [2,687 kB]
Get:6 http://ports.ubuntu.com/ubuntu-ports oracular/main x64 libubsan1 x64 14.2.0-4ubuntu2 [1,152 kB]
Get:7 http://ports.ubuntu.com/ubuntu-ports oracular/main x64 libhwasan0 x64 14.2.0-4ubuntu2 [1,598 kB]
Get:8 http://ports.ubuntu.com/ubuntu-ports oracular/main x64 libgcc-14-dev x64 14.2.0-4ubuntu2 [2,595 kB]
Get:9 http://ports.ubuntu.com/ubuntu-ports oracular/main x64 gcc-14-aarch64-linux-gnu x64 14.2.0-4ubuntu2 [20.9 MB]
Get:10 http://ports.ubuntu.com/ubuntu-ports oracular/main x64 gcc-14 x64 14.2.0-4ubuntu2 [511 kB]
Get:11 http://ports.ubuntu.com/ubuntu-ports oracular/main x64 gcc-aarch64-linux-gnu x64 4:14.1.0-2ubuntu1 [1,200 B]
Get:12 http://ports.ubuntu.com/ubuntu-ports oracular/main x64 gcc x64 4:14.1.0-2ubuntu1 [4,994 B]
Get:13 http://ports.ubuntu.com/ubuntu-ports oracular/main x64 libstdc++-14-dev x64 14.2.0-4ubuntu2 [2,471 kB]
Get:14 http://ports.ubuntu.com/ubuntu-ports oracular/main x64 g++-14-aarch64-linux-gnu x64 14.2.0-4ubuntu2 [12.1 MB]
Get:15 http://ports.ubuntu.com/ubuntu-ports oracular/main x64 g++-14 x64 14.2.0-4ubuntu2 [19.0 kB]
Get:16 http://ports.ubuntu.com/ubuntu-ports oracular/main x64 g++-aarch64-linux-gnu x64 4:14.1.0-2ubuntu1 [958 B]
Get:17 http://ports.ubuntu.com/ubuntu-ports oracular/main x64 g++ x64 4:14.1.0-2ubuntu1 [1,080 B]
Get:18 http://ports.ubuntu.com/ubuntu-ports oracular/main x64 make x64 4.3-4.1build2 [178 kB]
Get:19 http://ports.ubuntu.com/ubuntu-ports oracular/main x64 libdpkg-perl all 1.22.11ubuntu1 [279 kB]
Get:20 http://ports.ubuntu.com/ubuntu-ports oracular/main x64 lto-disabled-list all 53 [12.2 kB]
Get:21 http://ports.ubuntu.com/ubuntu-ports oracular/main x64 dpkg-dev all 1.22.11ubuntu1 [1,087 kB]
Get:22 http://ports.ubuntu.com/ubuntu-ports oracular/main x64 build-essential x64 12.10ubuntu1 [4,932 B]
Get:23 http://ports.ubuntu.com/ubuntu-ports oracular/main x64 diffstat x64 1.66-1build1 [28.1 kB]
Get:24 http://ports.ubuntu.com/ubuntu-ports oracular/main x64 libfakeroot x64 1.36-1 [33.0 kB]
Get:25 http://ports.ubuntu.com/ubuntu-ports oracular/main x64 fakeroot x64 1.36-1 [67.1 kB]
Get:26 http://ports.ubuntu.com/ubuntu-ports oracular/universe x64 gdebi-core all 0.9.5.7+nmu10 [132 kB]
Get:27 http://ports.ubuntu.com/ubuntu-ports oracular/universe x64 gdebi all 0.9.5.7+nmu10 [23.7 kB]
Get:28 http://ports.ubuntu.com/ubuntu-ports oracular/main x64 gettext x64 0.22.5-2 [930 kB]
Get:29 http://ports.ubuntu.com/ubuntu-ports oracular/main x64 intltool-debian all 0.35.0+20060710.6 [23.2 kB]
Get:30 http://ports.ubuntu.com/ubuntu-ports oracular/main x64 libalgorithm-diff-perl all 1.201-1 [41.8 kB]

Setting up libpackage-stash-perl (0.40-1) ...
Setting up libimport-into-perl (1.002005-2) ...
Setting up libmoo-perl (2.005005-1) ...
Setting up liblist-someutils-perl (0.59-1) ...
Setting up gcc-14 (14.2.0-4ubuntu2) ...
Setting up liblist-someutils-xs-perl:x64 (0.58-3build4) ...
Setting up g++-aarch64-linux-gnu (4:14.1.0-2ubuntu1) ...
Setting up g++-14 (14.2.0-4ubuntu2) ...
Setting up libmoox-aliases-perl (0.001006-2) ...
Setting up libb-hooks-endofscope-perl (0.28-1) ...
Setting up gcc (4:14.1.0-2ubuntu1) ...
Setting up libnamespace-clean-perl (0.27-2) ...
Setting up g++ (4:14.1.0-2ubuntu1) ...
update-alternatives: using /usr/bin/g++ to provide /usr/bin/c++ (c++) in
 auto mode
Setting up build-essential (12.10ubuntu1) ...
Setting up lintian (2.118.0ubuntu1.1) ...
Processing triggers for install-info (7.1-3build2) ...
Processing triggers for desktop-file-utils (0.27-2build1) ...
Processing triggers for gnome-menus (3.36.0-1.1ubuntu3) ...
Processing triggers for libc-bin (2.40-1ubuntu3.1) ...
Processing triggers for man-db (2.12.1-3) ...
#Download the .deb file
Save the .deb file to your preferred location.
#Open with GDebi
Right-click the .deb file in your file manager, select Open With, and choose GDebi Package Installer. Alternatively, launch GDebi from the terminal:
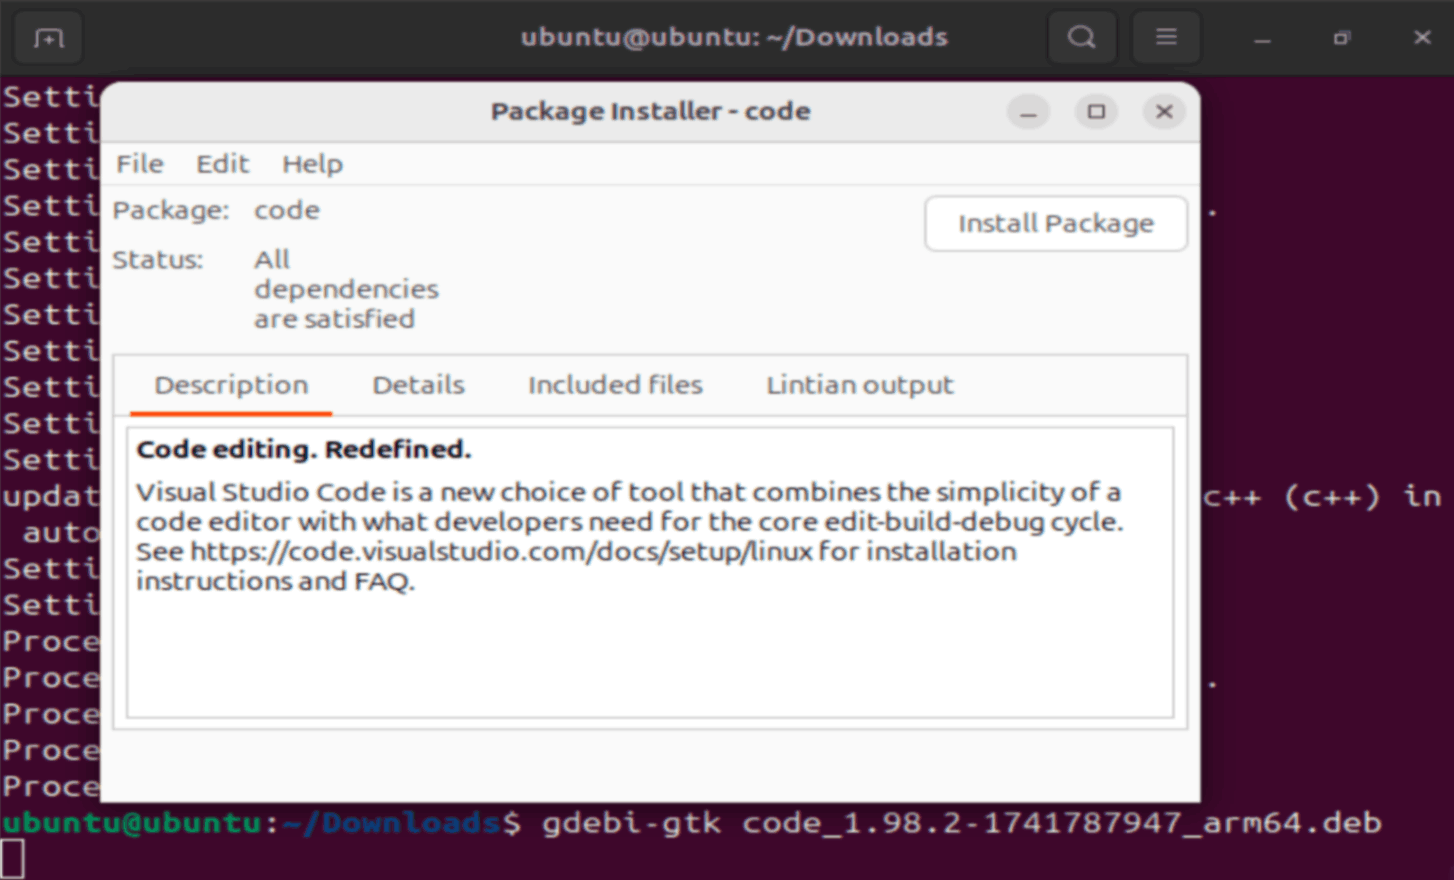
gdebi-gtk code_1.98.2-1741787947_amd64.deb
#Review package details
This will open the package installer for Visual Studio Code. GDebi will display the package’s details, including dependencies and file contents.
#Install the .deb package
Click the Install Package button.
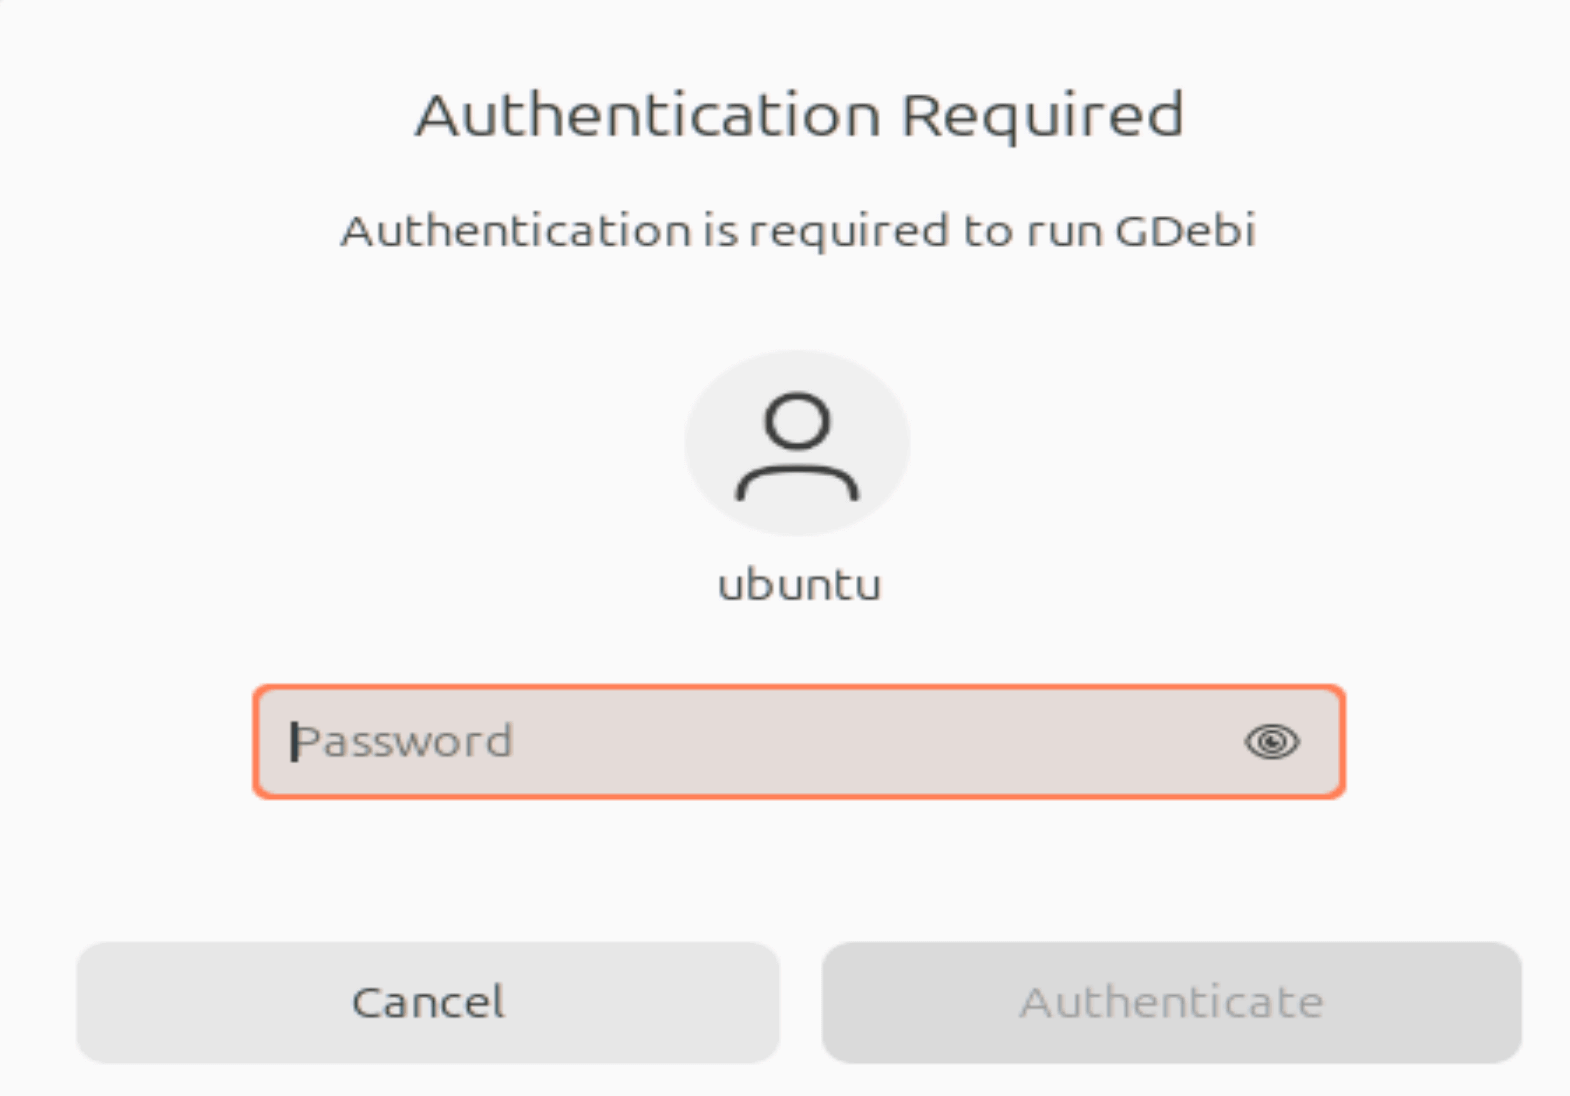
Type your password when prompted and press Enter. GDebi will resolve dependencies (if online) and install the software.
Click on next to add the Microsoft apt repository for Visual Studio Code.

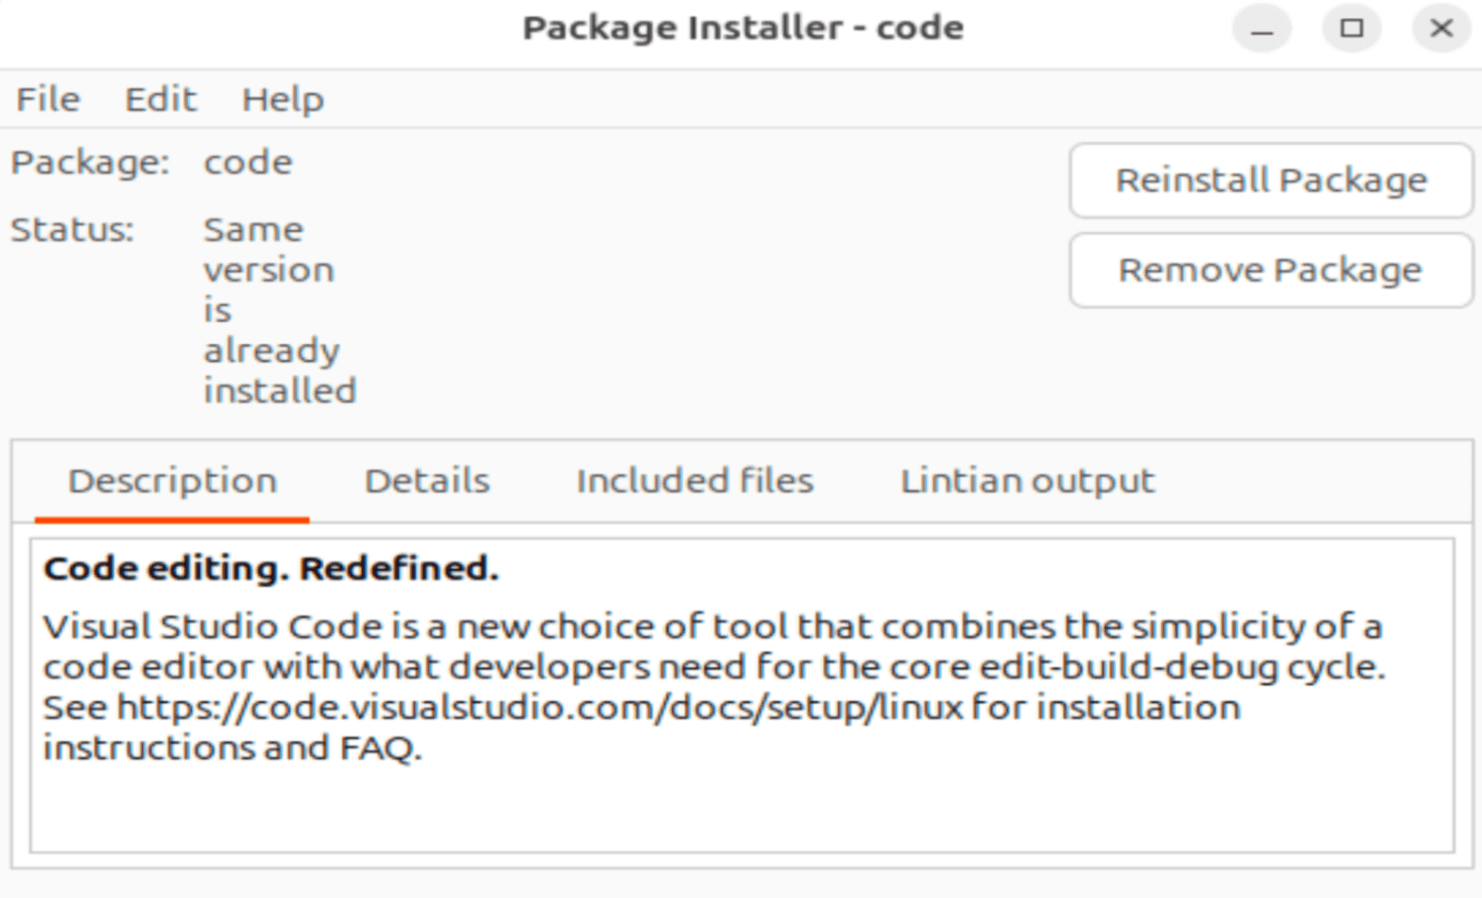
In a few seconds, the installation will be finished. Click on Close.

You will be able to see the status is Same version is already installed.
#Confirm installation
Go to the terminal and check if the code version is displayed correctly.
code --version
Output1.98.2
ddc367ed5c8936efe395cffeec279b04ffd7db78
x64
Pros:
- Lightweight and fast.
- Shows detailed package information.
- Resolves dependencies automatically.
Cons:
- Requires initial installation of GDebi.
- Less polished than the default Software Install app.
#Troubleshooting common issues
No matter which method you choose, you might run into issues. Here are some common problems and solutions:
#Dependency errors
- Symptom: Installation fails with a dependency-related message.
- Fix: Use sudo apt install -f (after dpkg) or ensure you’re online with apt or GDebi.
#File not found
- Symptom: Terminal says the .deb file doesn’t exist.
- Fix: Double-check the filename and your current directory with
lsordir.
#Permission denied
- Symptom: You are told you lack permission.
- Fix: Use sudo before your command or ensure you have admin rights.
#Corrupted .deb file
- Symptom: Installation fails with a corruption error.
- Fix: Re-download the file from the source.
#Best practices for installing .deb files
- Verify the source: It is imperative to obtain .deb files from authorized websites because they safeguard against potential malware.
- Check compatibility: Ensure the compatibility of your .deb file with your Ubuntu version 24.04 and your system architecture.
- Update your system: Run both commands,
sudo apt update&sudo apt upgrade, before starting the installation if you have not updated your system recently to prevent software conflicts. - Remove unused packages: Run
sudo apt autoremoveto clean up your system after completing package installation.
#Conclusion
Installing a .deb file on Ubuntu 24.04 is straightforward, thanks to the variety of tools available. You can select from all the installation approaches according to your preference, including the GUI-based Software Install or GDebi and the advanced methods of apt and dpkg. You are free to try multiple approaches since each method has unique advantages.
This guide contains detailed instructions allowing you to install any .deb file confidently. Happy installing!